How to Automate your PDF Generation
Using our service you can automate the generation of PDF documents such as invoices, receipts, and more. In this article, we explain how to use our API and Zapier Integrations for generating dynamic PDF documents.

The traditional way of creating a PDF using Adobe Acrobat Pro can be tedious and time-consuming.
When you need to generate many PDFs this way, each one with unique data can be unfeasible and cost-prohibitive. Our automated pdf generation solution will save you valuable time and money.
That is where a service that can automate this process can become extremely useful. We at cloudlayer.io have created a service that lets you generate pdf documents using our easy-to-use REST API or one of our no-code integrations like Zapier.
PDF Generation Service
We offer a couple of solutions for generating PDFs and creating content. We support the following:
- HTML to PDF API
- URL to PDF API
- HTML to PDF Zapier Integration (#no-code)
- URL to PDF Zapier Integration (#no-code)
Using HTML has many advantages over creating a PDF, the standard way using a tool like Adobe Acrobat. For one, it allows you to use all the very powerful HTML tools and frameworks available. Secondly, you can use predefined HTML templates you find anywhere on the internet as a starting point for your form.
HTML to PDF
Our PDF Generation service is used to generate PDFs. You can use the HTML to PDF API or our HTML to PDF Zapier integration. You can easily take any valid HTML you have and convert it to a pdf. It can include things like Javascript, CSS, Images, Fonts, etc. as long as it's valid HTML, we will take it and render it using the Chrome rendering engine.
This allows you to take any HTML Templates you find on the web and turn it into PDF Templates simply by passing them into our service. Our PDF Generation service will handle the rest for you.
You can also pass in several options into our service to customize the page size, margins, and more. Take a look at our documentation for a full set of options available.
URL to PDF
You can also use our PDF Generation service with an existing website that you already have hosted somewhere by using the URL to PDF API or our URL to PDF Zapier integration.
You can even have it password-protected using basic authentication or use an authentication cookie with our service. We support both authentication methods. Take a look at our documentation for more info.
Using this method, you can convert reports, dashboards, or anything you have to a PDF. We will fetch the URL for you, render it and generate the pdf documents.
Using our CDN
Once you have generated your PDF documents using our PDF Generation service we will store your asset on our content delivery network. Keep in mind this is entirely optional, and you can completely disable storage on our service if don't want us to ever store anything. You can read more about storage in our documentation.
Depending on which plan you sign up for, included in your account is cloud storage. All generated assets will be kept in your cloud storage and will generate an asset URL.
You can use this asset URL to deliver the content to your users. Bandwidth is unlimited using this URL. Your assets are optimized for efficient delivery to your customers. The URLs are cryptographically unique, so they are private and secure.
How to use the PDF Generation API
Let us quickly go over how to use the PDF Generation API. For full details on it and more examples, take a look at our documentation.
Using the HTML to PDF Generation API
The endpoint for the HTML to PDF Generation API is at:
https://api.cloudlayer.io/v2/html/pdf - Create a POST request, and set up your `X-API-Key` header for authentication to our API. You can get this from your dashboard. Full instructions are here.
- Pass in the JSON as the request body.
{
   "html": "..."
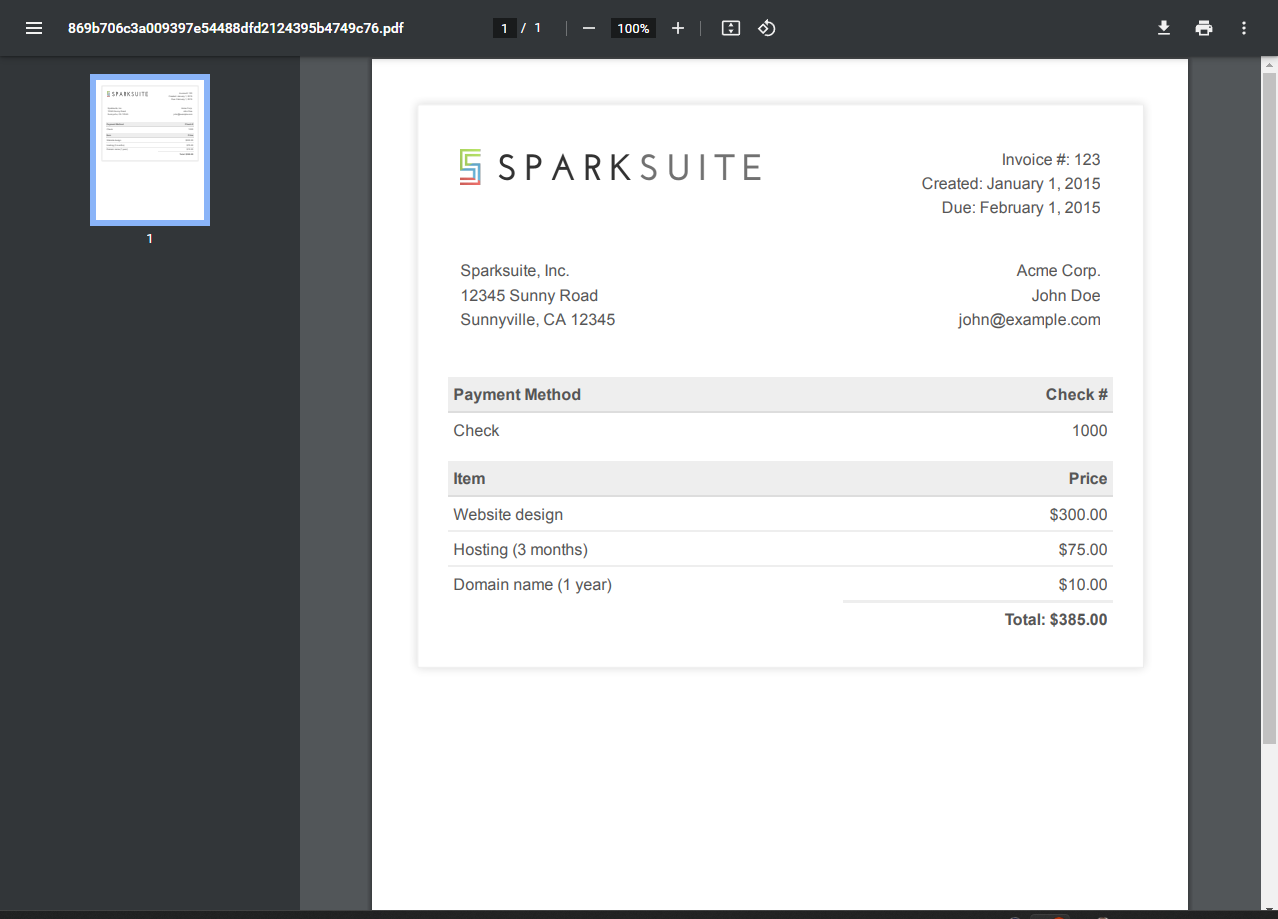
}In this example, we use the HTML from https://github.com/sparksuite/simple-html-invoice-template/blob/master/invoice.html to create a basic invoice PDF. To pass HTML into our service, the HTML must be base64 encoded first to ensure it does not interfere with the JSON. You can use any base64 conversion tool to do this such as a VSCode extension.
Once you submit the post, you will get a response back similar to the one below:
{
	"apiCreditCost": 1,
	"apiKeyUsed": "...",
	"assetId": "ac92c80c-5f37-49c9-b37a-5f29dbae32fa",
	"assetUrl": "https://assets.cloudlayer.io/prod/28ee05af9cddb9ffe08548eb1ced55dff73ab629/pdf/869b706c3a009397e54488dfd2124395b4749c76.pdf",
	"fileId": "a5a5a024-2f8c-4294-aef5-772c26255d75",
	"id": "a5a5a024-2f8c-4294-aef5-772c26255d75",
	"params": {
		"async": true,
		"delay": 0,
		"html": "...",
		"storage": true,
		"timeout": 30000,
		"type": "html-pdf",
		"waitUntil": "networkidle2"
	},
	"processTime": 300,
	"size": 90458,
	"status": "success",
	"timestamp": 1653661048936,
	"type": "html-pdf",
	"userId": "...",
	"workerName": "app-worker-0-5fbdfbc869-nsrq2"
}Above, you can see some basic details of the job and the `assetUrl`. Note this URL is private and protected by cryptographically unique strings in it.
Looking closely, you will see the PDF was generated in 300 milliseconds. Our PDF Generation Service is extremely fast, and retrieving the asset from the CDN is even faster as it's optimized and cached on edge servers worldwide to be as close to your users as possible for extremely fast delivery.
Once it's shared and made public, it will be accessible to whoever has access to it. It can be made public if you want to make it public, or use it on a website that is up to you.
If you load the `assetUrl` from above, you will see the generated pdf documents. In this example, it is only a single pdf document.
Using the URL to PDF Generation API
The endpoint for the URL to PDF Generation API is at:
https://api.cloudlayer.io/v2/url/pdf- Create a POST request, and set up your `X-API-Key` header for authentication to our API. You can get this from your dashboard. Full instructions are here.
- Pass in the JSON as the request body.
{
   "url": "https://sparksuite.github.io/simple-html-invoice-template/"
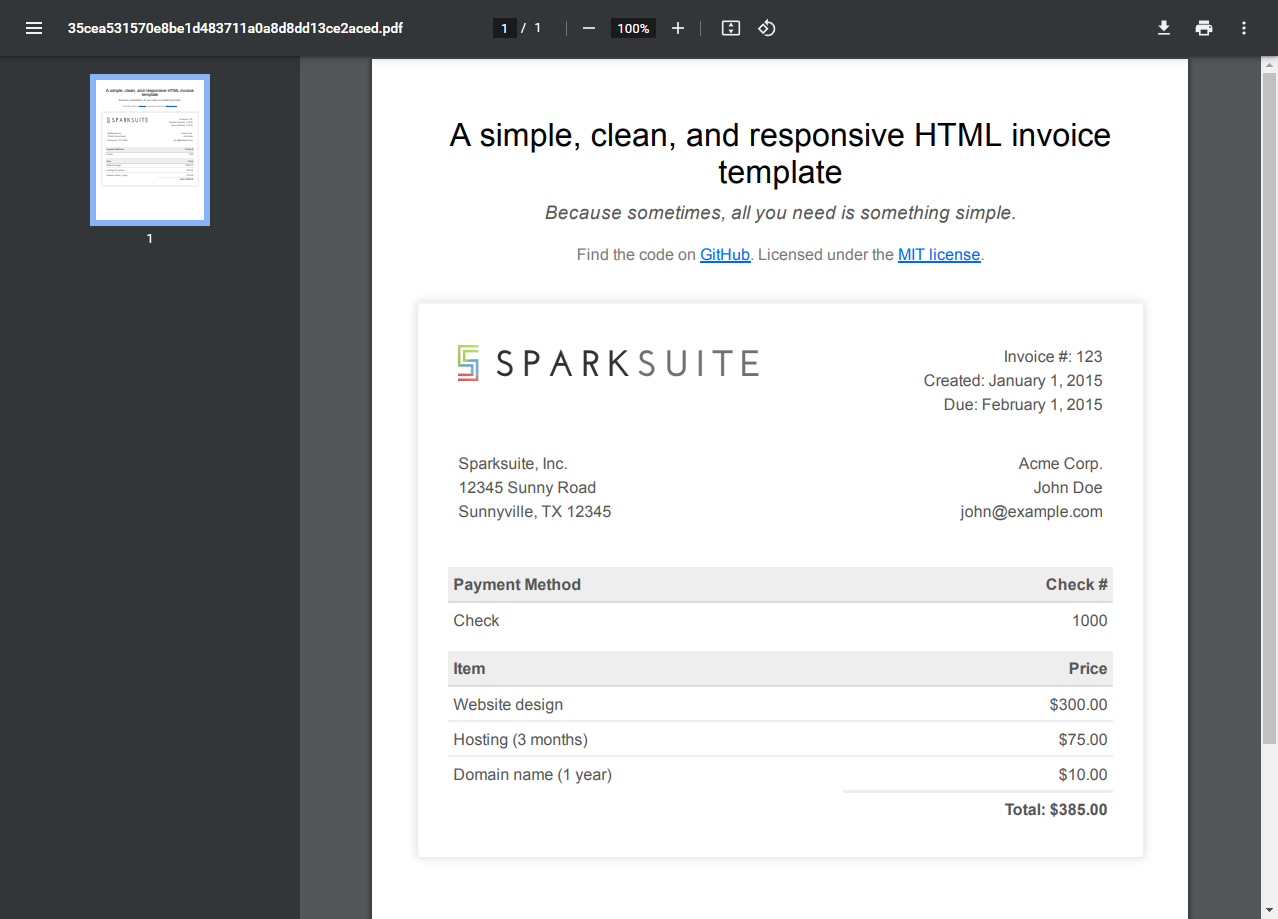
}In this example, we use the demo site for the invoice template from SparkSuite. It's a hosted page, so we pass in the URL.
Once you submit the post, you will get a response back similar to the one below:
{
	"apiCreditCost": 1,
	"apiKeyUsed": "...",
	"assetId": "e9e692f2-70ac-4878-ac2b-1d193d084796",
	"assetUrl": "https://assets.cloudlayer.io/prod/28ee05af9cddb9ffe08548eb1ced55dff73ab629/pdf/35cea531570e8be1d483711a0a8d8dd13ce2aced.pdf",
	"fileId": "d26ce8b0-1604-40df-9142-b285612c55fc",
	"id": "d26ce8b0-1604-40df-9142-b285612c55fc",
	"params": {
		"async": true,
		"delay": 0,
		"storage": true,
		"timeout": 30000,
		"type": "url-pdf",
		"url": "https://sparksuite.github.io/simple-html-invoice-template/",
		"waitUntil": "networkidle2"
		},
	"processTime": 1200,
	"size": 106048,
	"status": "success",
	"timestamp": 1653662748211,
	"type": "url-pdf",
	"userId": "...",
	"workerName": "app-worker-0-5fbdfbc869-x6sbw"
}Same as the HTML example, above you can see some basic details of the job, and the `assetUrl`, note this URL is private and protected by the cryptographically unique strings in it.
Again, if you look closely, you can see the `processTime` for this example is higher than the HTML one. That is simply because it takes time to fetch the URL.
It is significantly faster to render HTML passed into the service. Even passing int the URL into our PDF generator API, you still get an extremely fast render time that is 1.2 seconds.
You may notice the `waitUntil` parameter. You can read more about how that works in another article we wrote discussing that in detail. It is important since the Chrome rendering engine needs to know when to consider your page fully loaded and to begin converting to a PDF.
Taking a look at the rendered output is very similar to the HTML to PDF output. The SparkSuite demo added some text to the top of their page on the demo site, which is the only difference.
Using the no-code HTML to PDF Zapier Integration
If you don't want to write any code at all but need to convert HTML to a PDF, you can use our Zapier Integration.
- First, log in to Zapier and create a new Zap to start.
- Now let's say you have a Google sheets spreadsheet with all of your variable invoice data in it, and you want to generate a PDF for every new row in your sheet.
- Choose the "New Spreadsheet Row in Google Sheets" action.
Spreadsheet Setup
In this example, the sheet looks something like this:

We are keeping everything on a single row for simplicity's sake, you can do more elaborate setups in Zapier if you would like.
Setup Trigger
Choose the "New Spreadsheet Row in Google Sheets" action.
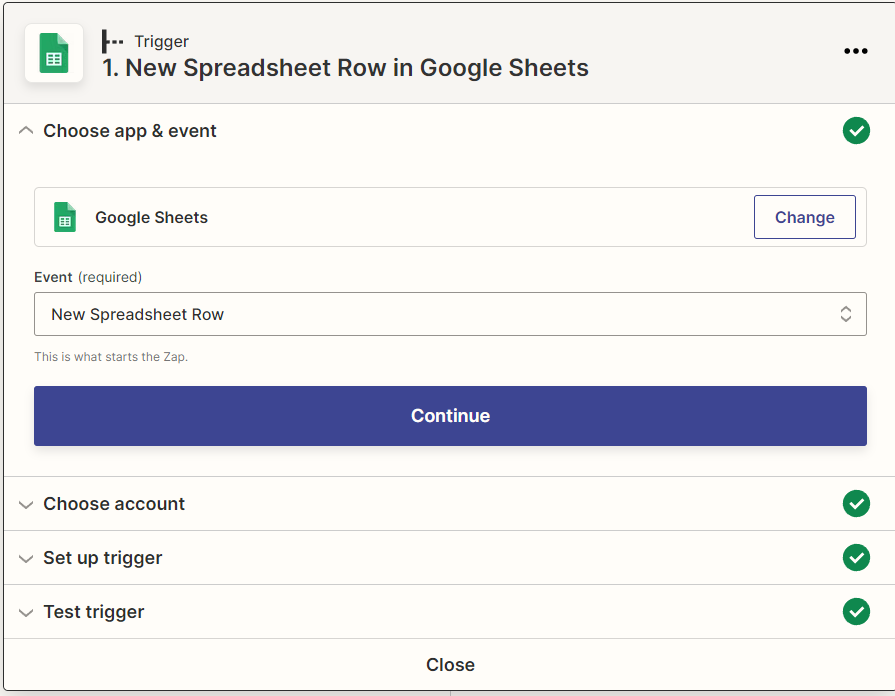
Walkthrough all the steps to make sure your spreadsheet is set up properly.
Add up Invoice Items Action
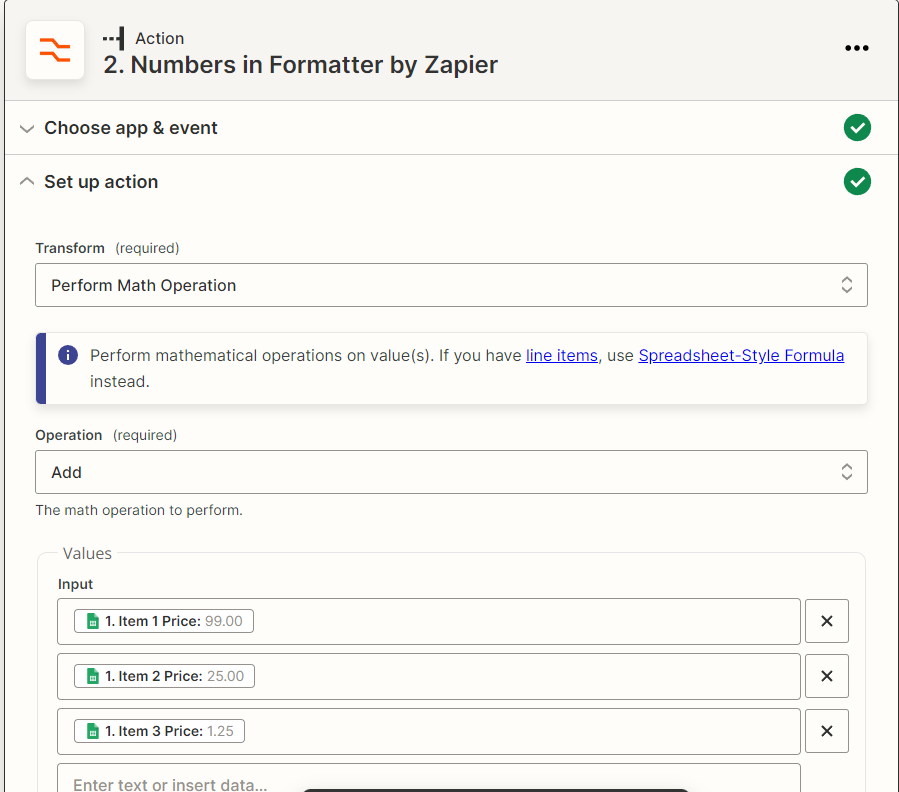
Next, we need a way to add up all the invoice items. Zapier has an action called "Formatter", and in that, you can choose "Numbers", and the "Add" action.
HTML to PDF Action
Next, add an action, search for "cloudlayer.io" and choose "HTML to PDF". If this is the first time you will have to set up your "cloudlayer.io" integration with Zapier, it's very simple. Just paste in your API Key when the dialog pops up, and you are good to go.
In the "Set up action" step, you will paste the plain HTML of the invoice example from SparkSuite into the textbox. The Zap handles the base64 conversion discussed in the HTML to PDF section. You do not need to worry about that when using the Zap.
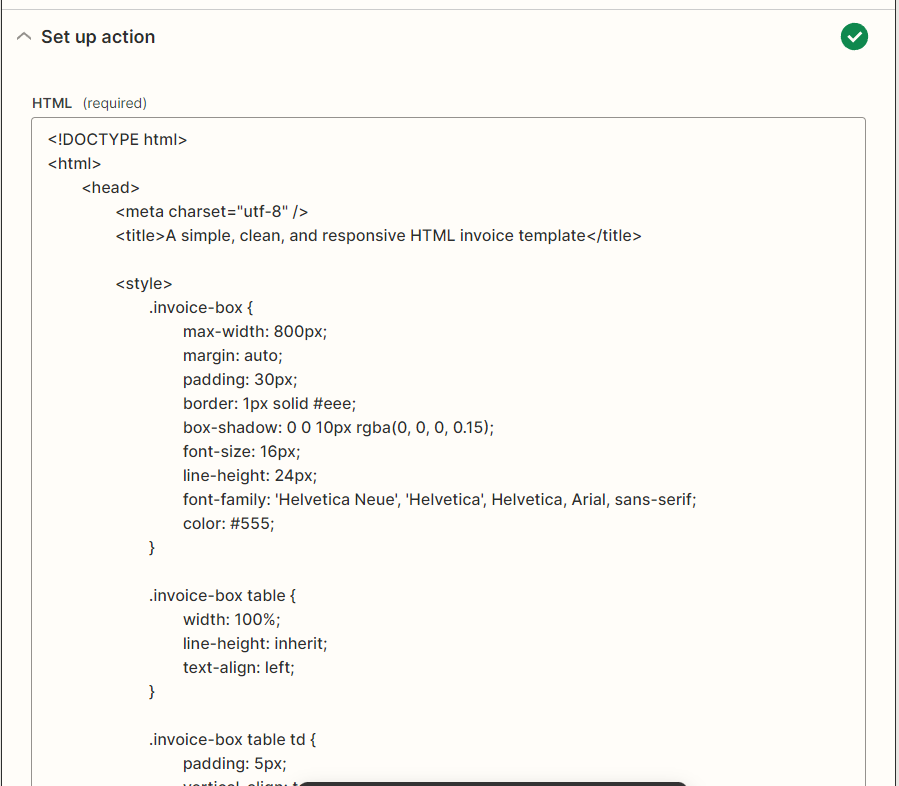
Now it's time the replace all the static data with dynamic data from the spreadsheet. The Zapier editor can be a bit odd here but highlight the static text you want to replace without clicking scroll all the way down to the bottom until you see the "Insert Data..." dialog.
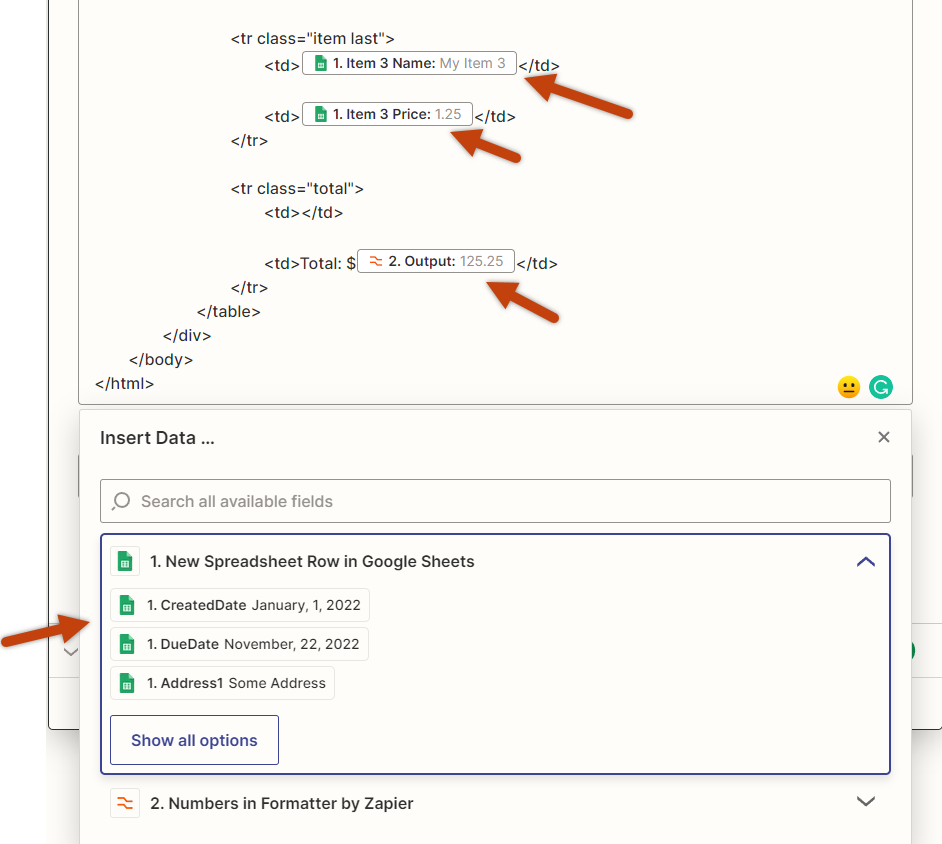
You will replace all the static text with these dynamic placeholders in the textbox. Then you can test your Zap by clicking "Retest & review" or "Test & review". Once you click this, you will get a response. To see the result, open your "cloudlayer.io" Dashboard.
You will see the PDF files generated on the dashboard and can verify the output is accurate. You can now create an additional step in Zapier to take the "assetUrl" and do whatever you want with it. You can send it to your user's email address, etc.
This was just an example of using Google Sheets and our HTML to PDF Zapier integration. You can use any combination you want with Zapier, such as Airtable.
How to get started
If you want to try our PDF Generation Service, you can create a free account. It has free credits so that you can try it out for no cost.
Look at our pricing page, or create your free account to start today.
Related Blog Posts


